
Cleaning teeth with braces takes 5 to 8 minutes per session, three times a day. The 7 essential steps:
- Brush after every meal with a soft-bristle brush (or orthodontic brush) for 2 minutes
- Use the right toothbrush: soft bristles, small head, or an electric brush with an orthodontic mode
- Use less toothpaste than usual (a pea-sized amount) so you can see what you’re cleaning
- Floss daily with a floss threader or water flosser (Waterpik) to clean between teeth and under wires
- Rinse with fluoride mouthwash at night to strengthen enamel
- Avoid sticky, hard, and sugary foods that get stuck or break brackets
- See your orthodontist every 4 to 8 weeks for adjustments and professional cleaning
This guide explains each step in detail, the right tools to buy, what to do when you slip up, and how to handle a real professional cleaning at the dentist while you have braces. Built from the actual daily protocol Dr. Polina Ingberman, DDS at Brace Central in Brooklyn gives every patient at debonding follow-up.
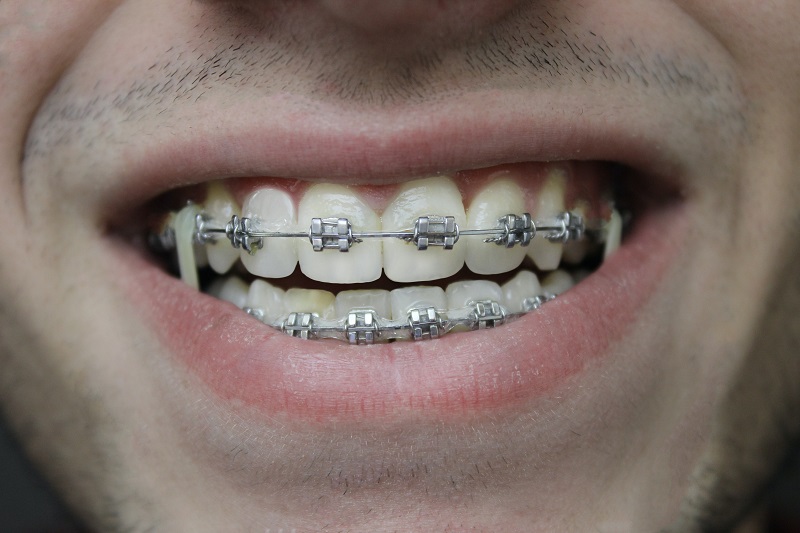
The 7 essential steps to clean teeth with braces
Step 1: Brush after every meal (2 minutes)
Brush three times a day at minimum: morning, after lunch, and before bed. The standard “twice a day” rule does not apply to braces because brackets and wires trap food the moment you eat. Wait about 30 minutes after a meal before brushing if you ate or drank something acidic (orange juice, soda, tomato sauce); brushing immediately after acid can damage softened enamel. For the rest of the day, brush as soon as practical after eating. A 2-minute session per brushing is the minimum effective duration; spend 30 seconds on each quadrant of the mouth.
Step 2: Pick the right toothbrush
Use a soft-bristle toothbrush with a small head. Medium and hard bristles damage enamel and gums and are not better at cleaning around brackets. The two best options are an orthodontic toothbrush (V-shaped bristle pattern that wraps around brackets) or an electric toothbrush with an orthodontic head. Both are widely available; either works as long as the bristles are soft. Replace the brush every 2 to 3 months, more often if the bristles fray. Brackets shred bristles faster than natural teeth do.
Step 3: Use the right amount of toothpaste
Use a pea-sized amount of fluoride toothpaste, not the long ribbon shown in commercials. Too much toothpaste creates excess foam that hides what you are actually cleaning, making it harder to see whether food is dislodged from around brackets. Less paste, more visibility, better cleaning. Brush in small circles around each bracket, then along the gum line, then across the chewing surface.
Step 4: Floss daily (threader or Waterpik)
Flossing with braces requires either a floss threader or a water flosser (Waterpik). A threader is a stiff plastic loop that lets you pass standard floss under the wire and between teeth, one tooth at a time. Threaders are inexpensive but tedious. A Waterpik shoots a high-pressure water stream that flushes debris from between teeth and under wires in seconds; it is faster, easier, and especially effective for dislodging food trapped after meals. Most patients find Waterpiks substantially more practical for daily use, with threaders reserved for occasional deep cleaning.
Step 5: Rinse with fluoride mouthwash
End the bedtime brushing session with a 30-second rinse using a fluoride mouthwash (alcohol-free is gentler on gums). Fluoride strengthens enamel and reduces the white-spot decalcification that is the most common cause of permanent stains around brackets after debonding. Avoid mouthwashes with high alcohol content during long-term use; they dry out the mouth and can irritate gums already stressed by orthodontic appliances.
Step 6: Avoid foods that cause problems
The food rules: avoid hard foods (whole apples, raw carrots, hard candy, ice cubes, bagels), sticky foods (caramel, gum, taffy, dried fruit), and crunchy foods (popcorn, hard pretzels, nuts). These either break brackets, bend wires, or get trapped in places no brush can reach. Cut hard fruits into small pieces, choose soft alternatives, and skip anything that has to be torn off. See our first-week food guide for the full list of safe and unsafe foods.
Step 7: Schedule regular orthodontic appointments
Visit your orthodontist every 4 to 8 weeks for adjustments and to check that bonding is intact. Schedule a regular dental cleaning every 6 months (more often if your orthodontist recommends it). Skipping either appointment is the most common cause of treatment delays and post-treatment stains. The orthodontist can spot problems early; the dentist can deep-clean places you cannot reach at home.
The 5 best tools for cleaning braces (and what to skip)
For patients searching for “braces cleaners” or wondering what to buy, the short list:
- Soft-bristle or orthodontic toothbrush. Manual or electric, both work if bristles are soft.
- Floss threader. A box of 100 costs a few dollars; lasts for months.
- Water flosser (Waterpik). Bigger upfront cost but pays for itself in time saved daily. Get one with an orthodontic tip.
- Interdental brush (proxabrush). Tiny conical brush that fits between brackets and wire, useful for stuck food in awkward spots.
- Fluoride mouthwash. Alcohol-free, ADA-accepted. One bottle lasts 1 to 2 months.
What to skip: whitening toothpastes (uneven results because brackets block bleach contact), hard-bristle brushes (damage enamel), high-alcohol mouthwashes (dry mouth and gum irritation), wire flossers (tear easily on brackets), and any “DIY” cleaning hacks involving baking soda or hydrogen peroxide pastes (they remove enamel over time).
How dentists clean teeth with braces (professional cleaning)
Patients often ask how dentists clean teeth with braces still in place. The professional cleaning process:
- Visual inspection first, looking for plaque, decalcification (white spots), or loose brackets
- Hand-scaling around brackets with thin metal instruments designed to fit between bracket and gum line
- Ultrasonic scaler at low power to break up tartar around the brackets and wire (high power can dislodge brackets)
- Polishing paste applied with a soft rubber cup, avoiding the bracket faces (bracket bonding can be weakened by aggressive polishing)
- Fluoride varnish applied after cleaning, especially around bracket edges where decalcification is highest risk
- Floss demonstration if the patient is struggling at home; the hygienist can show technique with a threader or Waterpik
A professional cleaning during braces typically takes 45 to 60 minutes, longer than a regular cleaning, because of the extra navigation around appliances. Schedule one every 6 months, sooner if your orthodontist or dentist sees plaque or staining building up.
What to do if you miss a cleaning session
Missing a brushing or two is not a crisis, but the longer plaque sits, the harder it is to remove. If you miss a cleaning:
- Within hours: Brush as soon as possible. Use the floss threader or Waterpik more thoroughly than usual.
- Within a day: Brush twice in succession with a 5-minute gap to give fluoride time to work. Use mouthwash.
- Multiple days missed: Schedule an early professional cleaning. Hardened tartar will not come off with home tools and continues to attract more plaque.
- Travel or hospitalization: Pack a travel kit with a mini brush, threaders, and a small bottle of mouthwash. Even quick rinses with water after meals help significantly.
Common mistakes that cause cavities under brackets
The most common hygiene mistakes during orthodontic treatment, in order of frequency:
- Brushing only the front of teeth while ignoring the back surfaces and chewing surfaces
- Skipping flossing because it is annoying with braces (this is the #1 cause of decalcification stains around brackets)
- Using too much toothpaste, creating foam that hides whether brackets are clean
- Ignoring the gum line right above and below each bracket where plaque concentrates
- Eating sticky or hard foods on the orthodontist’s no list, breaking brackets and trapping food
- Skipping appointments, both orthodontic and regular dental cleanings
Decalcification (white square-shaped marks left around where brackets used to be) is permanent and visible after braces come off. It is also entirely preventable with consistent hygiene during treatment.
Cleaning Invisalign vs cleaning braces (key differences)
For patients deciding between treatments or comparing experiences, the cleaning differences:
- Invisalign trays remove for eating and brushing. Brush teeth normally, clean trays separately with a soft brush and water (no toothpaste, which scratches plastic).
- Braces stay on. Brush around brackets and under wires three times daily, use threader or Waterpik for flossing.
- Time per session: Invisalign cleaning is ~3 minutes (teeth) plus 1 minute (trays). Braces cleaning is ~5 to 8 minutes per session.
- Tools needed: Invisalign needs only a normal toothbrush and a tray-cleaning solution. Braces need a soft brush, floss threader or Waterpik, mouthwash, and ideally an interdental brush.
- Cavity risk: Higher with braces because food traps around brackets. Lower with Invisalign because trays come out for eating.
For more on different orthodontic options, see our guides on removable orthodontic appliances, braces with a crown, and the retainer that comes after treatment.
Frequently Asked Questions
How long should I brush my teeth when I have braces?
Two minutes per brushing session, three times a day (morning, after lunch, before bed). That works out to 6 minutes total brushing time, plus floss-threader or Waterpik use once daily. Each session covers all four quadrants of the mouth, around brackets, along the gum line, and across chewing surfaces.
Is a Waterpik better than flossing with braces?
For most patients, yes. A Waterpik is faster, easier, and more effective at flushing food from under wires and between teeth than a floss threader. Floss threaders still have a place for occasional deep cleaning, but daily Waterpik use is more practical for most braces patients.
Can I use whitening toothpaste with braces?
No. Whitening toothpaste produces uneven results because brackets block contact between the bleach and the tooth surface underneath. After debonding, the brackets leave squares of unwhitened enamel surrounded by lighter areas. Use a fluoride toothpaste during treatment and whiten after braces come off if desired.
How do dentists clean teeth with braces still on?
Dentists use hand-scaling instruments designed to fit around brackets, low-power ultrasonic scalers, and soft polishing cups. They avoid aggressive polishing on brackets themselves because it can weaken bonding. A professional cleaning during braces typically takes 45 to 60 minutes, longer than a routine cleaning.
What is the best way to clean braces if I am traveling?
Pack a travel kit: mini soft toothbrush, fluoride travel toothpaste, floss threaders (small and lightweight), travel-size fluoride mouthwash, and an interdental brush. If you cannot brush, rinse vigorously with water after meals. Resume the full routine as soon as possible.
Do I need to clean my teeth differently if I have a fixed retainer after braces?
Yes, slightly. Fixed retainers (the wire bonded behind the front teeth) need flossing with a threader or Waterpik because regular floss cannot pass under the wire. Otherwise, the cleaning routine is the same as for normal teeth.
Need a hands-on demo of cleaning techniques for your braces? Book a follow-up at Brace Central in Brooklyn. Our hygienists demonstrate threader and Waterpik technique customized to your specific bracket setup. Schedule a Brooklyn consultation.
Related guides for your braces journey: do orthodontists file teeth after braces?, how long after getting braces can you eat, what to eat the first week with braces, and braces before and after results.
Disclaimer: This article is for informational purposes only and is not a substitute for professional medical advice, diagnosis, or treatment. Always consult with a qualified orthodontist or dentist regarding any oral health concerns specific to your case.